In this tutorial, we will build a chatbot that only lets specific users access it. We’ll start with the LangGraph template and add token-based security step by step. By the end, you’ll have a working chatbot that checks for valid tokens before allowing access.This is part 1 of our authentication series:
Set up custom authentication (you are here) - Control who can access your bot
Create a new chatbot using the LangGraph starter template:
Copy
pip install -U "langgraph-cli[inmem]"langgraph new --template=new-langgraph-project-python custom-authcd custom-auth
The template gives us a placeholder LangGraph app. Try it out by installing the local dependencies and running the development server:
Copy
pip install -e .langgraph dev
The server will start and open Studio in your browser:
Copy
> - 🚀 API: http://127.0.0.1:2024> - 🎨 Studio UI: https://smith.langchain.com/studio/?baseUrl=http://127.0.0.1:2024> - 📚 API Docs: http://127.0.0.1:2024/docs>> This in-memory server is designed for development and testing.> For production use, please use LangSmith.
If you were to self-host this on the public internet, anyone could access it.
Now that you have a base LangGraph app, add authentication to it.
In this tutorial, you will start with a hard-coded token for example purposes. You will get to a “production-ready” authentication scheme in the third tutorial.
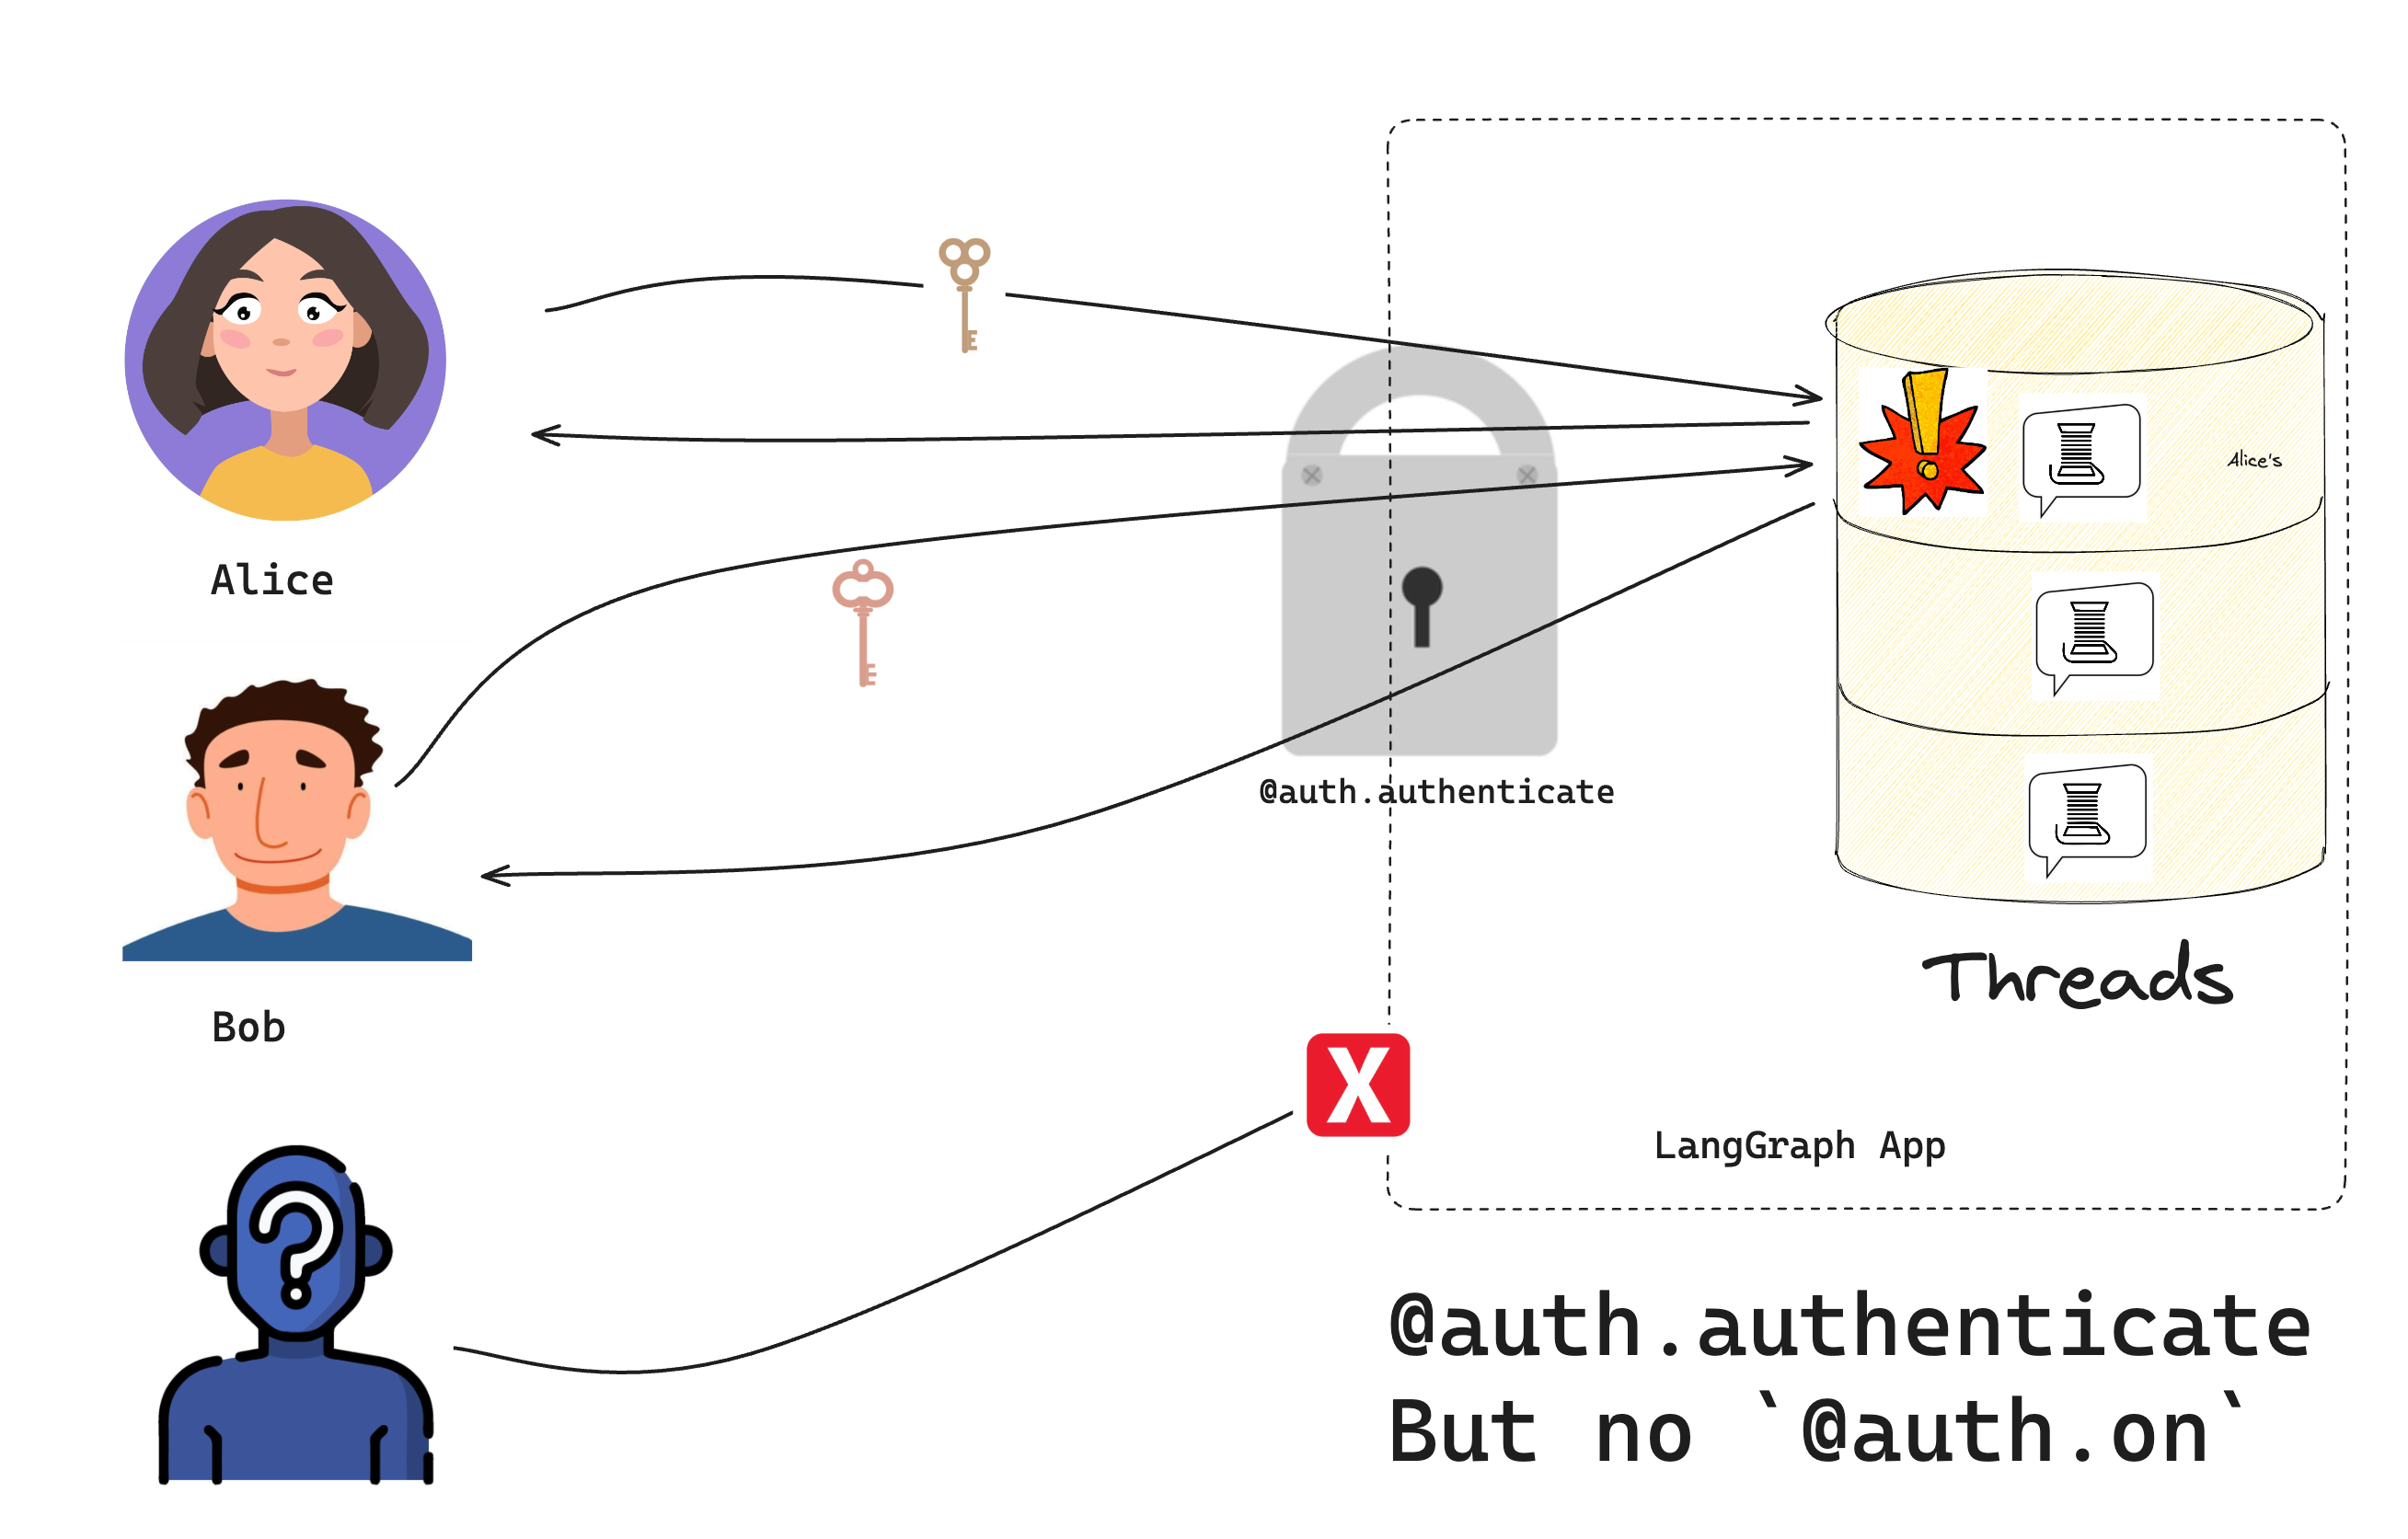
The Auth object lets you register an authentication function that the LangSmith deployment will run on every request. This function receives each request and decides whether to accept or reject.Create a new file src/security/auth.py. This is where your code will live to check if users are allowed to access your bot:
src/security/auth.py
Copy
from langgraph_sdk import Auth# This is our toy user database. Do not do this in productionVALID_TOKENS = { "user1-token": {"id": "user1", "name": "Alice"}, "user2-token": {"id": "user2", "name": "Bob"},}# The "Auth" object is a container that LangGraph will use to mark our authentication functionauth = Auth()# The `authenticate` decorator tells LangGraph to call this function as middleware# for every request. This will determine whether the request is allowed or not@auth.authenticateasync def get_current_user(authorization: str | None) -> Auth.types.MinimalUserDict: """Check if the user's token is valid.""" assert authorization scheme, token = authorization.split() assert scheme.lower() == "bearer" # Check if token is valid if token not in VALID_TOKENS: raise Auth.exceptions.HTTPException(status_code=401, detail="Invalid token") # Return user info if valid user_data = VALID_TOKENS[token] return { "identity": user_data["id"], }
Notice that your Auth.authenticate handler does two important things:
If you didn’t add the --no-browser, the Studio UI will open in the browser. By default, we also permit access from Studio, even when using custom auth. This makes it easier to develop and test your bot in Studio. You can remove this alternative authentication option by setting disable_studio_auth: true in your auth configuration:
You should now only be able to access the bot if you provide a valid token in the request header. Users will still, however, be able to access each other’s resources until you add resource authorization handlers in the next section of the tutorial.Run the following code in a file or notebook:
Copy
from langgraph_sdk import get_client# Try without a token (should fail)client = get_client(url="http://localhost:2024")try: thread = await client.threads.create() print("❌ Should have failed without token!")except Exception as e: print("✅ Correctly blocked access:", e)# Try with a valid tokenclient = get_client( url="http://localhost:2024", headers={"Authorization": "Bearer user1-token"})# Create a thread and chatthread = await client.threads.create()print(f"✅ Created thread as Alice: {thread['thread_id']}")response = await client.runs.create( thread_id=thread["thread_id"], assistant_id="agent", input={"messages": [{"role": "user", "content": "Hello!"}]},)print("✅ Bot responded:")print(response)
You should see that:
Without a valid token, we can’t access the bot
With a valid token, we can create threads and chat
Congratulations! You’ve built a chatbot that only lets “authenticated” users access it. While this system doesn’t (yet) implement a production-ready security scheme, we’ve learned the basic mechanics of how to control access to our bot. In the next tutorial, we’ll learn how to give each user their own private conversations.